Foodie Friday — Apple-Cinnamon Coffeecake

Hello friends!

Today I am sharing with you a recipe for an Apple-Cinnamon Coffeecake.  It’s apple season and this recipe is wonderful (and quick)!  Another plus is that this recipe comes from Cooking Light Magazine, so it’s okay if you eat two pieces.  Haha!

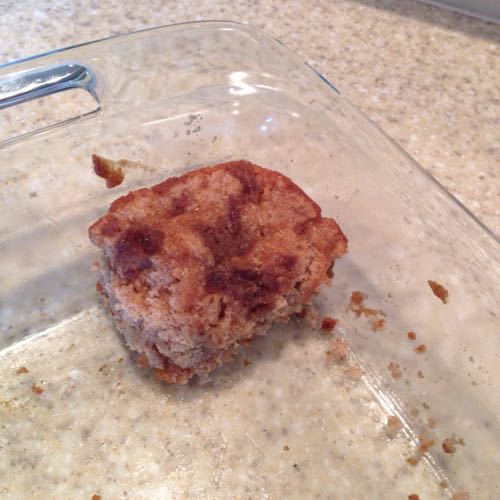
The picture below shows you my almost empty cake dish.  This happened in our house in less than 24 hours after I made this coffeecake.  Apparently, it was a hit!

Apple Coffee Cake

Here’s the recipe:

Cake:

1 1/2 cups all-purpose flour

1 cup granulated sugar

1 1/2 teaspoons baking powder

1 1/2 teaspoons ground cinnamon

1/2 teaspoon salt

3/4 cup 1% low-fat milk

2 tablespoons butter, melted

1 teaspoon vanilla extract

1 large egg, lightly beaten

1 cup diced peeled Granny Smith apple (about 1 apple)

Cooking spray

Streusel:

1/4 cup packed brown sugar

2 tablespoons all-purpose flour

1/2 teaspoon ground cinnamon

2 tablespoons chilled butter, cut into small pieces

Preheat oven to 350 degrees.  To prepare cake, lightly spoon 1 1/2 cups flour into dry measuring cup; level with a knife.  Combine flour and next 4 ingredients (through salt) in a large bowl, stirring with a whisk.  Make a well in center of mixture.  Combine milk, melted butter, vanilla, and egg, stirring with a whisk; add to flour mixture, stirring just until moist.  Fold in apple.  Pour batter into an 8-inch square baking pan coated with cooking spray.

To prepare streusel, combine brown sugar, 2 tablespoons flour, and 1/2 teaspoon cinnamon; cut in butter with a pastry blender or 2 knives until mixture resembles coarse meal.  Sprinkle streusel evenly over batter.  Bake at 350 degrees for 45 minutes or until a wooden pick inserted in center comes out clean.  Cool in pan 10 minutes on a wire rack before serving.  Serve warm.

This cake is best served warm.  To prepare ahead, cool completely, wrap (still in pan) in foil, and leave out at room temperature for up to one day, or freeze for up to three months.  To reheat thawed cake, unwrap and bake at 250º for 15-20 minutes.

Yummy!  Hope you enjoy.

Wendy

PIZZA NIGHT

What do you have for dinner on Friday nights?  I don’t know about you, but by the end of the week I am ready for an “easy” dinner.  We’ve been having fun experimenting with different pizzas on Friday nights.  The kiddos always stick with the standard cheese and pepperoni, but my husband and I try to be a little more adventurous!

I thought I would share a recent discovery that I made for pizza dough.  It comes from the book My Pizza, by Jim Lahey, founder of Sullivan Street Bakery and Co. in New York City.  He was on the Martha Stewart Show one day and I had to run out and get his book.  The pizza crust looked so yummy!!  You can find his book on amazon.com.

Sorry that I do not have any pictures to share, but you can check his book out and it’s loaded with yummy looking pictures!

His basic pizza dough recipe is below  (make sure you read through it before starting) it’s a little different!

PIZZA DOUGH (makes enough for 4 pizzas)

3 3 /4 cups all-purpose flour, plus more for shaping

1/4 tsp. active dry yeast

2 tsp. fine sea salt

1 1/2 cups water

In a medium bowl, thoroughly blend the flour, yeast, and salt. Add the water and, with a wooden spoon or your hands, mix thoroughly.

Cover the bowl with plastic wrap or a kitchen towel and allow it to rise at room temperature for 18 hours or until is has doubled.  (side note:  I did not let mine rise for 18 hours).  Make sure to keep it in a warm room and it will rise quicker.

Flour a work surface and scrape out the dough.  Divide it into 4 equal parts and shape them:  for each portion, start with the right side of the dough and pull it toward the center; then do the same with the left, then the top, then the bottom.  The order isn’t important; what you want is four folds.  Shape each portion into a round and turn seam side down.  Mold the dough into a neat circular mound. The mounds should not be sticky; if they are, dust with more flour.

NOTE:  If you don’t intend to use the dough right away, wrap the balls individually in plastic and refrigerate for up to 3 days.  Return to room temperature by leaving them out on the counter, covered in a damp cloth, for 2 to 3 hours before needed.

Now go ahead and top with your favorites!

TO BAKE YOUR PIZZA:

Put your pizza stone on a rack in the oven about 4 inches from the broiler.  Preheat oven on bake at 500 degrees for 30 minutes.  Then, to boost the heat of the stone without the oven’s elements shutting down, open the oven door a few inches and leave it ajar for about 30 seconds.  Some of the ambient heat will escape, but the stone will stay just as hot.  Now close the oven door and switch to broil for 10 minutes to heat the surface to a maximum.  Open the door and slide the pizza in to broil. Since the stone is so close to the element, you may need to pull the rack out a few inches to get the pie centered on the stone; do it quickly and don’t worry about losing too much heat.  With the door closed, broil for roughly 5 minutes until the crust is adequately charred but not burnt and the toppings are bubbling. Check a couple of times, the pizza will cook quickly.

There you have it!  Go out and buy your favorite toppings and try this yummy pizza dough tonight!

Have a great weekend!

♥Wendy